By: Team CS2103-AY1920S2-W14-1 Since: Jan 2020 Licence: MIT
- 1. Welcome to CodeCampX
- 2. Quick Start
- 3. Components
- 4. Key Features
- 5. Commands
- 5.1. General
- 5.2. Assigning/Unassigning -TYPE- to a Course :
assignorunassignrespectively - 5.3. Mark a Student’s Assignment as
Done/Undone - 5.4. Select a Student/Staff/Course :
selector simply click the bar - 5.5. Switch between tabs :
[CTRL] + [UP ARROW],[CTRL] + [DOWN ARROW]m,s,t,c,f,a - 5.6. Saving the data
- 5.7. Clearing all the data
- 5.8. Student
- 5.9. Staff
- 5.10. Course
- 5.11. Finance
- 5.12. Assignment
- 5.13. Upcoming Features
- 6. Frequently Asked Questions (FAQ)
- 7. Command Summary
1. Welcome to CodeCampX
Code Camp X (CCX) is for those who prefer to use a desktop app to manage the administrative tasks of running a coding camp. More importantly, CCX is optimized for those who prefer to work with a Command Line Interface (CLI) while still having the benefits of a Graphical User Interface (GUI). If you can type fast, CCX can allow you to manage your camp’s administrative tasks faster than traditional GUI apps. Interested? Jump to the Section 2, “Quick Start” to get started. Enjoy!
1.1. Legend
The following 3 callouts will be used throughout the documentation which you may wish to pay attention to as it may contain important details:
| Just for your info, do not be alarmed. Be sure to read these notes as it might contain some important information. |
| Perhaps something can be done using another approach, but it is up to you to decide. Tips are often not important and can be safely ignored. |
| Some things might go wrong if you are not careful, or did not follow the instructions correctly. You are strongly advised to read whatever is in this block. |
1.2. A Quick Look at CodeCampX
CodeCampX’s user interface is split into a few sections. These sections are highlighted in the image below.

Let’s get started!
2. Quick Start
Follow this installation guide to get CodeCampX up and running on your computer.
-
Ensure you have Java version
9or later installed in your Computer.
-
Download the latest version here.
-
Copy the file to the folder you want to use as the home folder.
-
Double-click the file to start the app. The GUI should appear in a few seconds.
-
Type the command in the command box and press Enter to execute it.
e.g. typinghelpand pressing Enter will open the help window. -
Some example commands you can try:
-
help: Opens up the help page -
exit: Exits the application
-
-
Refer to Section 5, “Commands” for details of each command.
3. Components
CodeCampX consists of five core components: Students, Staffs, Courses, Finances, Assignments
3.1. Students
You can manage the students by assigning them to courses, and ensuring that they have paid for their courses.
3.2. Staffs
You can manage the staffs by providing information such as the phone number and email address. This is critical as staffs are the main point of contact during an emergency. You can keep track of which teacher staffs you have paid for teaching a course by checking via Finances.
3.3. Courses
You can keep track of the ongoing courses in your Coding Camp. Each course will have an assigned teacher, as well as a list of assigned students. The course fee should also be specified.
3.4. Finances
The built-in Sales Management component in CodeCampX provides you with the tools you will need to keep track of financial records efficiently. Several analytical features are also incorporated to assist you in financial decision-making and devising marketing strategies.
3.5. Assignments
You can keep track of the available assignments of the various students or courses through this functionality. Additionally, the progress of the assignments can be viewed for the course of the student (In Student Tab) or the student of a course (In Course Tab).
4. Key Features
4.1. Convenience
CodeCampX is an integrated application that will provide you with the utmost convenience and tools you will need to manage your Coding Camps. It allows you to:
-
Export data to
.json(default) or Excel file[coming in v2.0].
4.2. Security
We understand that digital security is your biggest concern. CodeCampX is capable of securing your restaurants' data by:
-
Encrypting all data using state of the art encryption scheme
[coming in v2.0]. -
Providing accountability through logging of system events.
4.3. Efficiency
Time is money. CodeCampX ensures that the application will:
-
Load within 5 seconds.
-
Execute commands within split of a second and update the GUI almost instantaneously.
5. Commands
CodeCampX is jam-packed with features and it may be daunting for new users. The subsequent sections of the user guide provides a step by step walk-through of all the commands CodeCampX has to offer.
Do read our short explanation about Command Format below so that the subsequent portions of this section will make sense to you.
Command Format
-
Words in
UPPER_CASEare the parameters to be supplied by the user e.g. inadd-student n/STUDENT_NAME,STUDENT_NAMEis a parameter which can be used asadd-student n/Bob. -
Items in square brackets are optional e.g
n/STUDENT_NAME [t/TAG]can be used asn/Bob t/loyalor asn/Bob. -
Items with
… after them can be used multiple times including zero times e.g.[t/TAG]…can be used ast/loyal,t/10years t/newetc. -
Parameters can be in any order e.g. if the command specifies
cid/COURSE_ID tid/TEACHER_ID,tid/TEACHER_ID cid/COURSE_IDis also acceptable.
5.1. General
The commands in this section does not tie to any of the 5 components.
5.1.1. Viewing help : help
Opens up the help window. Very useful if you are a new user.
Format: help
5.1.2. Exiting the program : exit
Exits the program.
Format: exit
5.1.3. Undo Command: undo
Set the app state back to the most recent undoableCommand.
|
See the full list of undoable commands: all edit/add/delete/assign/unassign/done/undone commands. |
Examples:
-
find-student hieu
undo
This will fail because find-student is not an undoableCommand.
-
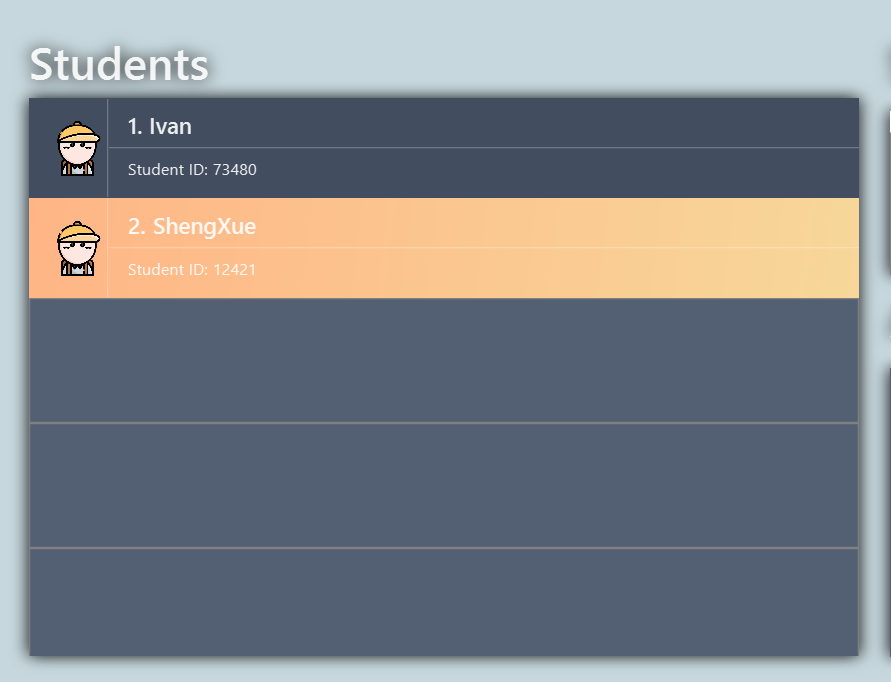
delete-student 35853
undo
Undo the delete command of student and add the student back at the previous relative ordering too.
Illustration:
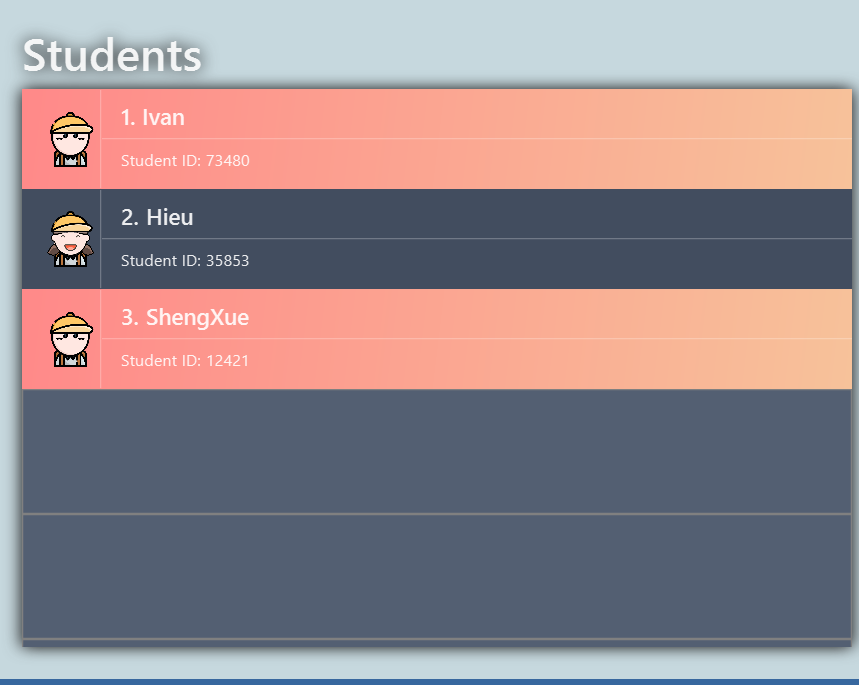
After delete-student 35853
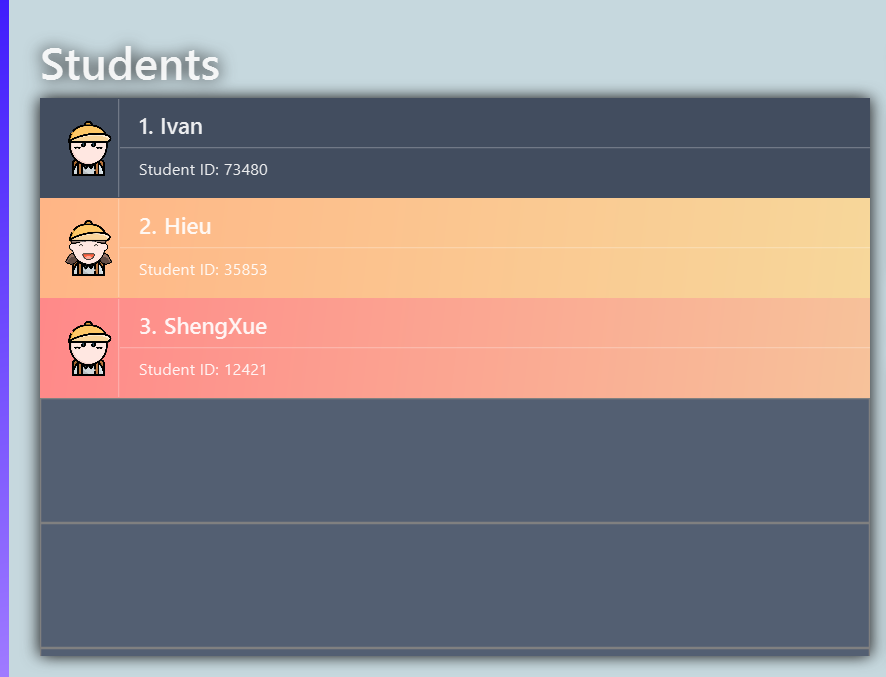
After undo:
5.1.4. Redo Command: redo
Reverses the most recent undo command, but will fail if the most recent command was not the undo command or redo
command
Examples:
-
delete-student 35853
undo
redo
Successfully delete the student, then add the student back with undo, then delete student again with redo
-
find-student hieu
redo
redo fails because no undo command previously
-
delete-student 35853
undo
find-student hieu
redo
This redo also fails because the most recent command is not undo or redo
Format: undo or redo
5.2. Assigning/Unassigning -TYPE- to a Course : assign or unassign respectively
5.2.1. Assign a Student to a Course : assign or unassign respectively
Adds the Student ID to the Course ID specified.
Format: assign cid/COURSEID sid/STUDENTID
Example: assign cid/829 sid/33
Removes the Student ID from the Course ID specified.
Format: unassign cid/COURSEID sid/STUDENTID
Example: unassign cid/829 sid/33
|
When a student is assigned to a course, a progress will be created for the student for every assignment of the course. This progress tracks whether the student has completed the specific assignment (Done) or not (Not Done) |
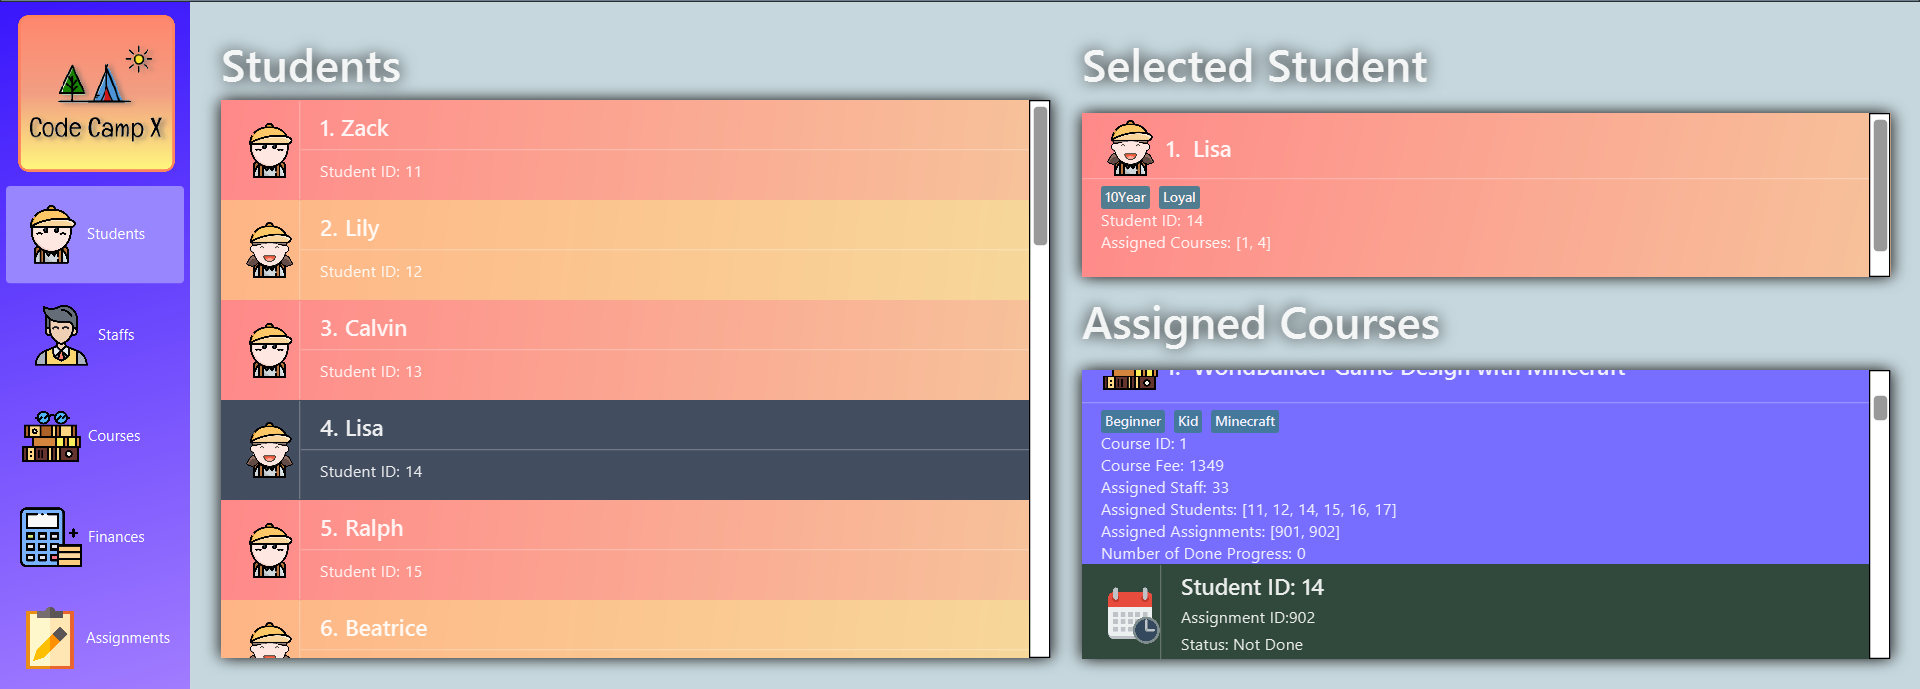
In Student Tab, Under Selected Student and Assigned Courses Panel, after assigning student to course, it can be seen that the progresses have been added for every assignment in the course. The Student’s progresses can be tracked by specific assignment status Done/ Not done. Total done progresses can be viewed under "Number of progress done" field.
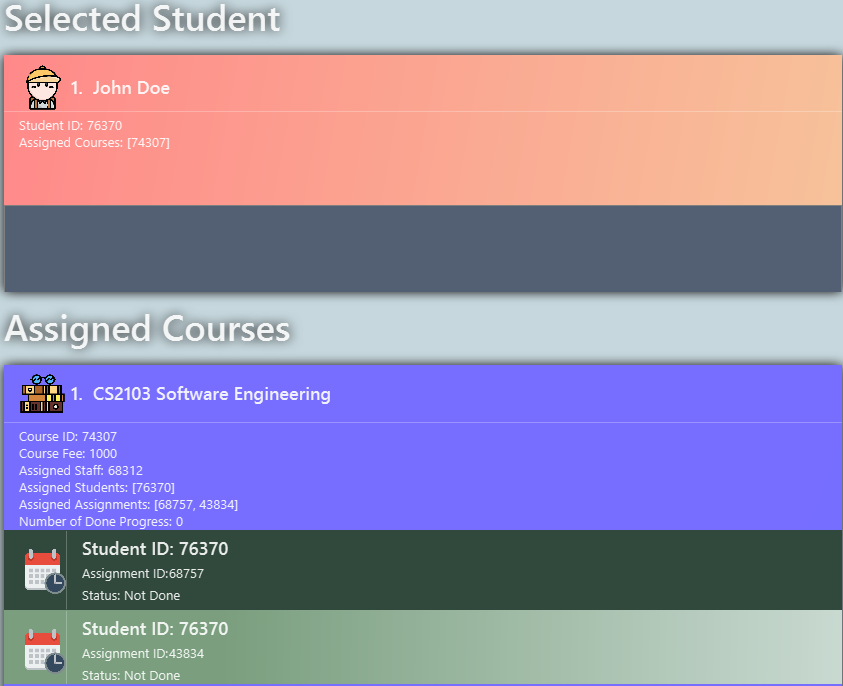
Student’s details and Assigned Assignments for this courses can also be viewed under Course Tab.

5.2.2. assign/unassign Teacher to/from a Course
Adds the Teacher ID to the Course ID specified.
Format: assign cid/COURSEID tid/TEACHERID
Example: assign cid/829 tid/21
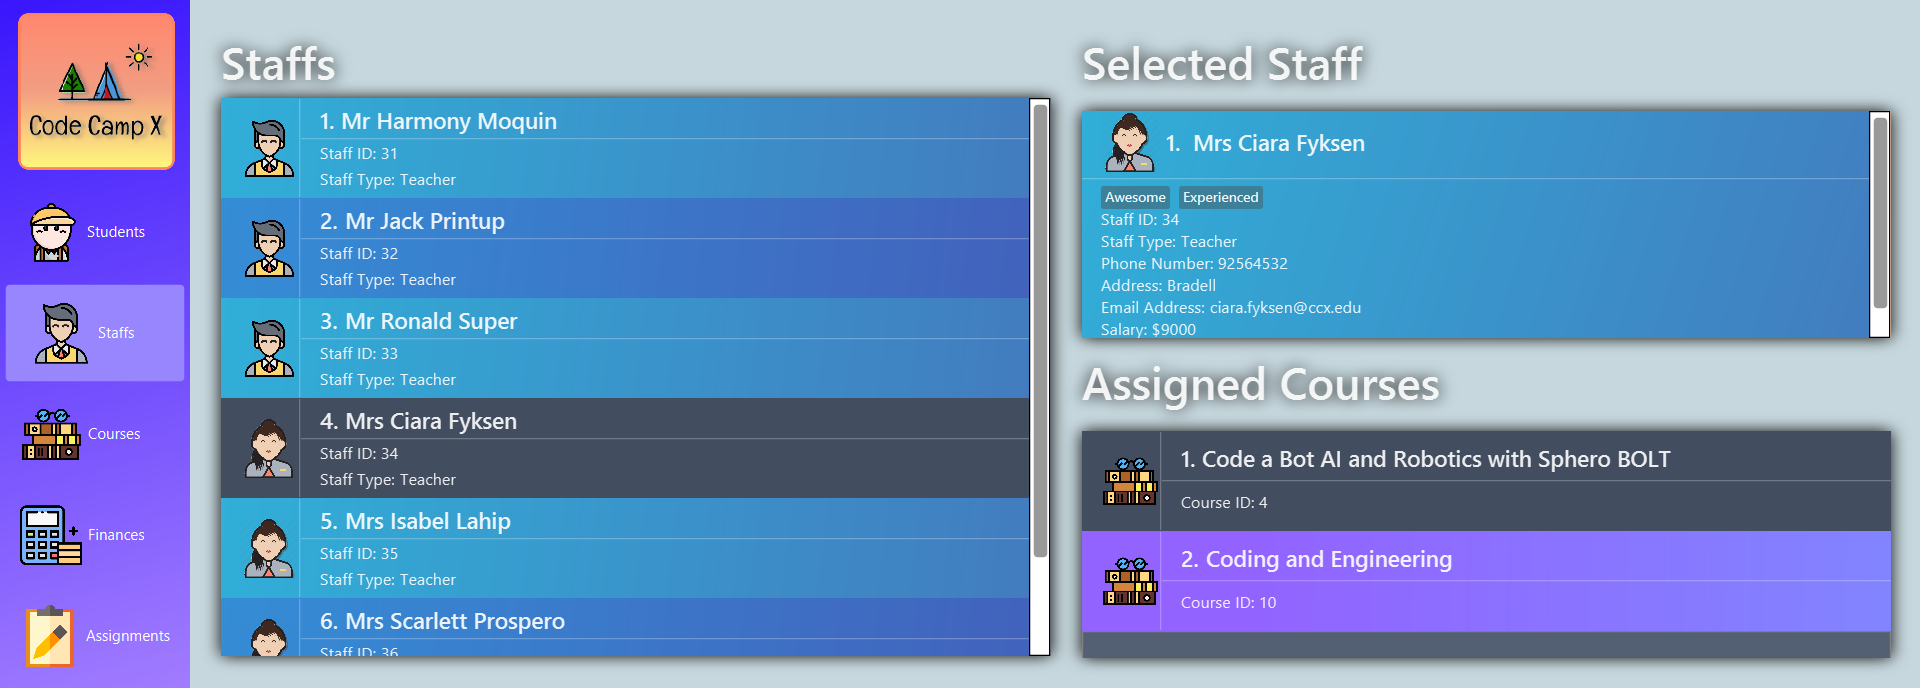
When a teacher is assigned to a course, the teacher’s ID is added to course and course’s ID is added to teacher. In Selected Staff Tab, it can be seen that a course ID is added under "Assigned Courses" and the course can be viewed in Assigned Courses Tab.
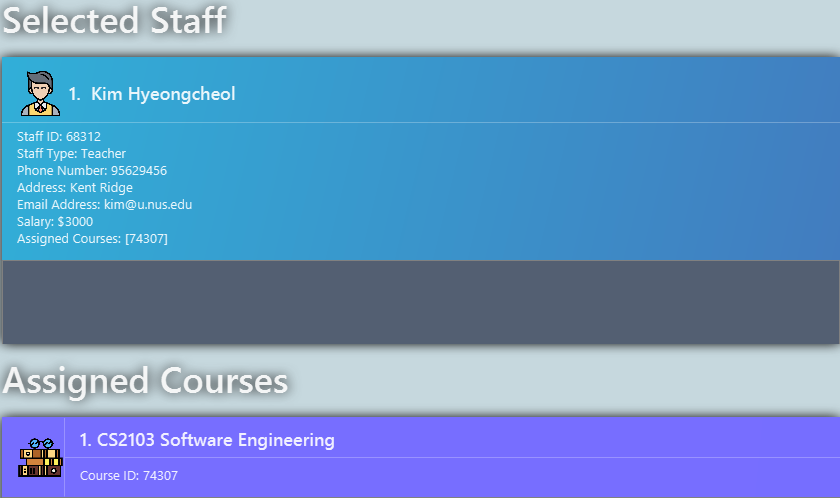
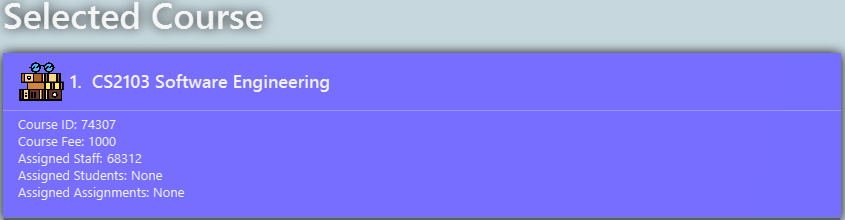
In Selected Course Tab, it can be seen that a staff ID is added under "Assigned Staff".
Removes the Teacher ID from the Course ID specified.
Format: unassign cid/COURSEID tid/TEACHERID
Example: unassign cid/829 tid/21
When a teacher is unassigned to a course, the teacher’s ID is removed from course and course’s ID is removed from teacher. In Selected Staff Tab, after unassign Command, the course’s ID and details no longer appears.
5.2.3. Add An Assignment to a Course : assign or unassign respectively
Adds the Assignment ID to the Course ID specified.
Format: assign cid/COURSEID aid/ASSIGNMENTID
Example: assign cid/829 aid/21
Removes the Assignment ID from the Course ID specified.
Format: unassign cid/COURSEID aid/ASSIGNMENTID
Example: unassign cid/829 aid/21
|
When an assignment is assigned to a course, a progress will be created for every student currently assigned to the course. This progress tracks whether the student has completed the specific assignment (Done) or not (Not Done) |
5.3. Mark a Student’s Assignment as Done/Undone
Mark a student’s assignment as Done.
Format: done aid/ASSIGNMENTID sid/STUDENTID
Example: done aid/829 sid/21
Mark a student’s assignment as Undone.
Format: undone aid/ASSIGNMENTID sid/STUDENTID
Example: undone aid/829 sid/21
Illustration:
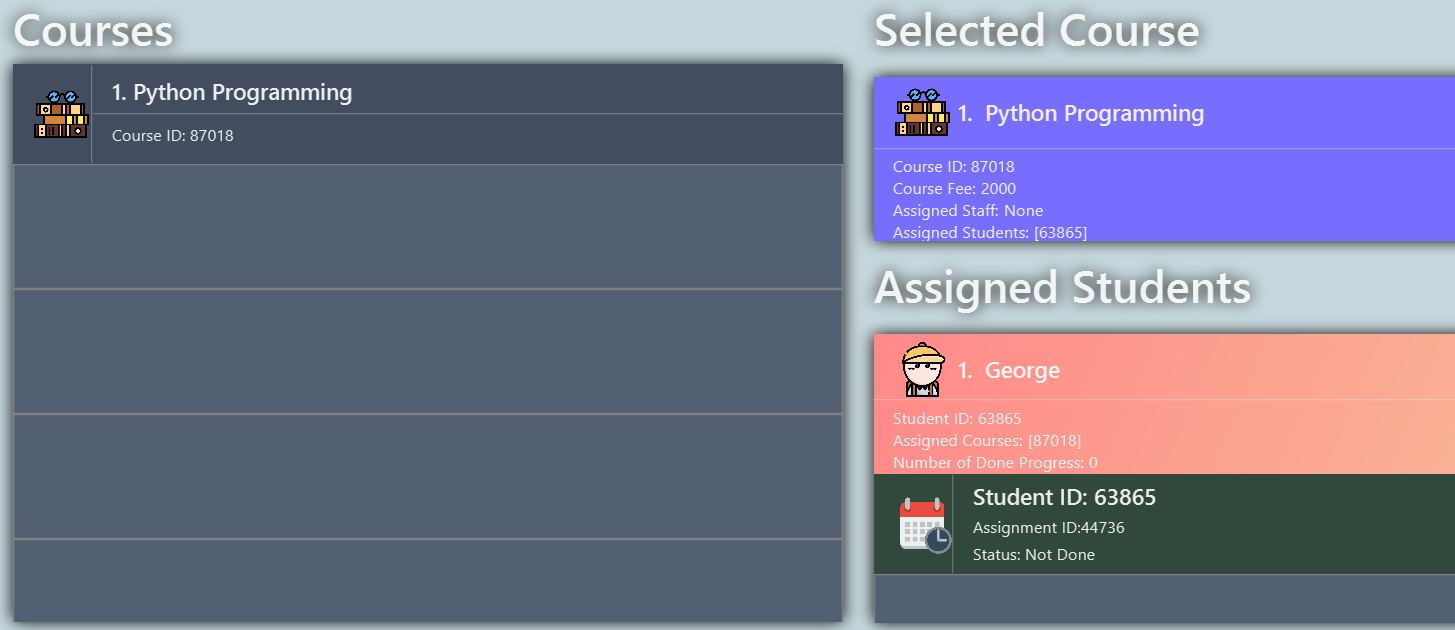
Notice that George has initially not completed Assignment 44736.
After done aid/44736 sid/63865:
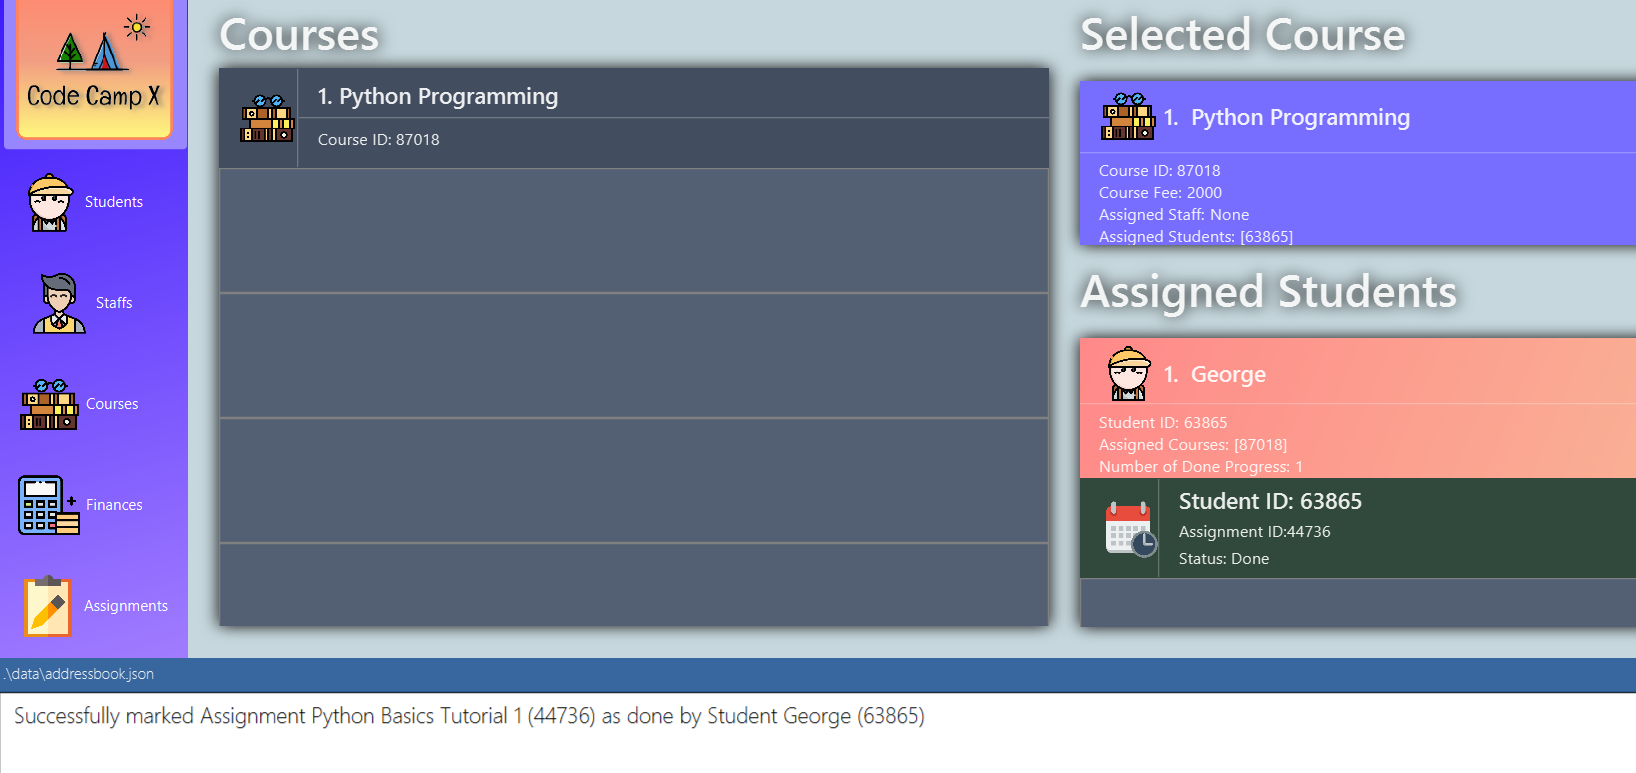
Now observe 3 updates:
-
Success message as displayed in message box
-
The
statusof the Assignment has been marked as done -
The
Number of Done Progresshas been incremented by 1
5.4. Select a Student/Staff/Course : select or simply click the bar
Selecting means to view the specified item in detail. As mentioned in the previous section, a course may be assigned student/s, a teacher staff, or assignment/s. When you select a course for example, you can view the list of students assigned in the list on the right.
If the specified ID does not exist, the selected panel will become empty.
5.4.1. Select a Student
Views details of a student and list of courses of a student
Format: select sid/STUDENTID
Example: select sid/11
or click the desired Student bar
5.4.2. Select Assignment belonging to the Course of a Student
Views list of Assignment belong to Course of a Student
Format: select sid/STUDENTID cid/COURSEID
Example: select sid/11 cid/1
or click the desired Course bar under the Student
5.4.3. Select a Staff
Views the details of a staff and list of courses of a staff
Format: select tid/STAFFID
Example: select tid/31
or click the desired Staff bar
5.4.4. Select a Course
Views the details of a course and list of students of a course
Format: select cid/COURSEID
Example: select cid/1
or click the desired Course bar
5.4.5. Select Assignment belonging to the Student of a Course:
Views list of Assignment belong to Student of a Course
Format: select cid/COURSEID sid/STUDENTID
Example: select cid/1 sid/11
or click the desired Student bar under the Course
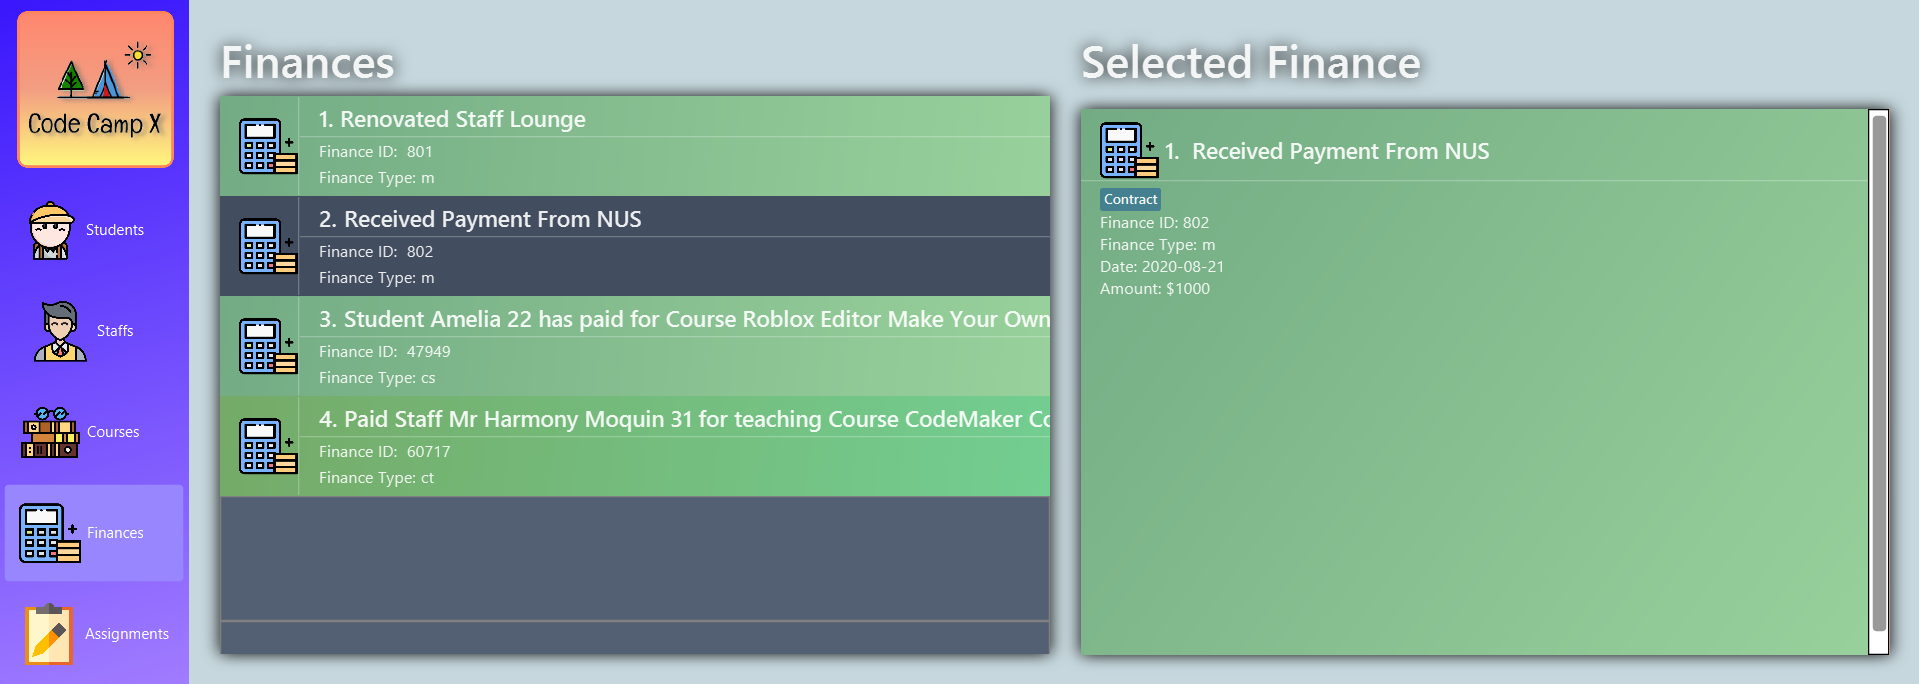
5.4.6. Select a Finance
Views the details of a finance
Format: select fid/FINANCEID
Example: select fid/801
or click the desired Finance bar
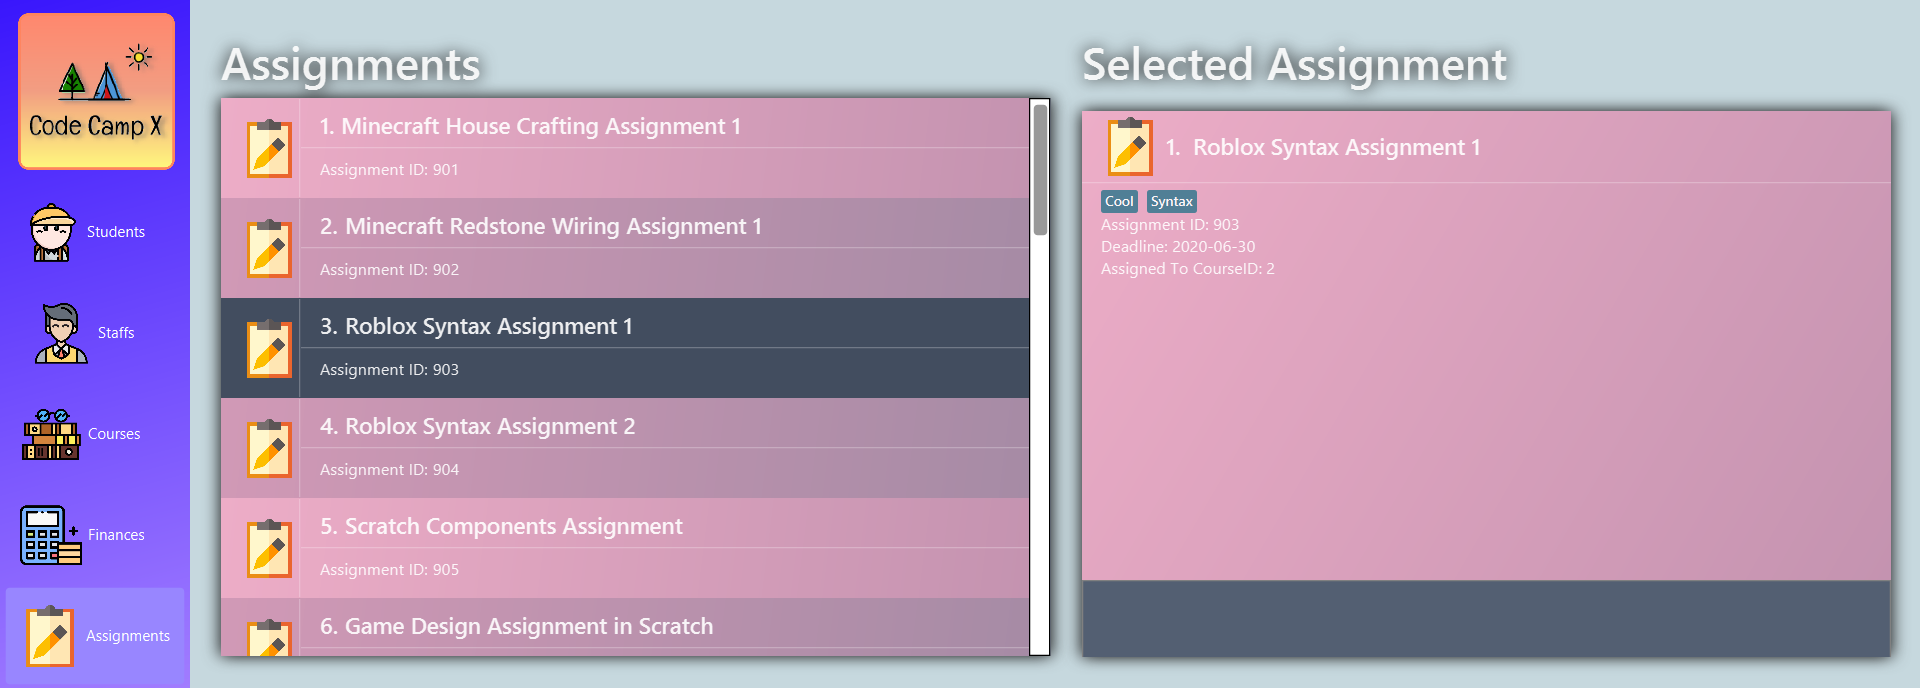
5.4.7. Select an Assignment
Views the details of an assignment
Format: select aid/ASSIGNMENTID
Example: select aid/901
or click the desired Assignment bar
5.5. Switch between tabs : [CTRL] + [UP ARROW], [CTRL] + [DOWN ARROW] m, s, t, c, f, a
-
The tab orders are: Summary, Staff, Course, Finance, Assignment
-
Switch quickly to previous Tab (with wrap around) : Click command box +
[CTRL]+[UP ARROW] -
Switch quickly to next Tab (with wrap around): Click command box +
[CTRL]+[DOWN ARROW] -
Switch quickly to Summary Tab :
morsummary -
Switch quickly to Student Tab :
sorstudent -
Switch quickly to Staff Tab :
torstaff -
Switch quickly to Course Tab :
corcourse -
Switch quickly to Finance Tab :
forfinance -
Switch quickly to Assignment Tab :
aorassignment
5.5.1. Navigate through your command history: [UP ARROW] or [DOWN ARROW]
-
Just like a typical CLI application, you can use up and down arrow keys to navigate through your command history
-
Click the command box and press
[UP ARROW]or[DOWN ARROW] -
Only complete and successfully executed commands will be added to this history
-
There will not be two identical commands beside each other
5.6. Saving the data
Coding Camp book data are saved in the hard disk automatically after any command that changes the data. No manual saving is required.
5.7. Clearing all the data
Coding Camp book data can be cleared by clear-all command. This action will CLEAR all the entire address book and
this action can not undone.
|
This will irrevocably clear the entire address book and you cannot undo it! Be very careful with this command. |
5.8. Student
5.8.1. Add a student: add-student
Add a new student to the list of student
Format: add student n/NAME g/GENDER [t/TAG]…
Example:
* add student n/Jon Snow g/m t/Hardworking
|
The Gender of the Student is shown in the form of a little icon
on the left. This automatically updates when you |
5.8.2. Remove a student: delete-student
Remove a student from the list of students
Format: delete-student ID
Example:
-
delete-student 16100
|
Be reminded that when you delete a student, the student will be deleted from every course as well |
5.8.3. Locating items by name: find-student
Finds student whose names contain any of the given keywords.
Format: find-student KEYWORD [MORE_KEYWORDS]…
Examples:
-
find-student Ned
ReturnsnedandNed Stark -
find-student Lannister Targaryen Stark
Returns any student having namesLannister,Targaryen, orStark
5.8.4. List all students: list-student
Shows a list of all students
Format: list-student
5.8.5. Edit information about a student: edit-student
Edits an existing student in the student list
Format: edit-student ID [n/NAME] [g/GENDER] [t/TAG]…
Example:
-
edit-student 16100 n/Aegon Targaryen t/freshman
5.9. Staff
5.9.1. Add a staff: add-staff
Add a new staff to the list of staff
Format: add-staff n/NAME lvl/LEVEL g/GENDER p/PHONE e/EMAIL s/SALARY a/ADDRESS [t/TAG]…
Example:
* add-staff n/Bob Ross lvl/teacher g/m p/98765432 e/bob.ross@gmail.com s/1000 a/311, Clementi Ave 2, #02-25 t/LovesArt t/Friendly
|
The lvl of the staff refers to the Staff Type. It can only be
specified as |
|
The Gender of the Staff is shown in the form of a little icon
on the left. This automatically updates when you |
5.9.2. Remove a staff: delete-staff
Remove a staff from the list of staffs
Format: delete-staff ID
Example:
-
delete-staff 16100
|
Be reminded that when you delete a staff that is of staff type: Teacher, the teacher will be deleted from every course as well. |
5.9.3. Locating items by name: find-staff
Finds staff whose names contain any of the given keywords.
Format: find-staff KEYWORD [MORE_KEYWORDS]…
Examples:
-
find-staff Ned
ReturnsnedandNed Stark -
find-staff Lannister Targaryen Stark
Returns any staffs having namesLannister,Targaryen, orStark
5.9.4. List all staffs: list-staff
Shows a list of all staffs
Format: list-staff
5.9.5. Edit information about a staff: edit-staff
Edits an existing staff in the staff list
Format: edit-staff ID [n/NAME] [g/GENDER] [p/PHONE] [e/EMAIL] [s/SALARY] [a/ADDRESS] [t/TAG]…
Example:
-
edit-staff 16100 n/Aegon Targaryen t/legend
|
You only can edit Name, Gender, Phone, Email, Salary, Address and Tags of a Staff. If you edit a salary of a Teacher Staff, all the Finance associated with him still remain the same. This is because a Finance is added based on the salary of a Teacher at that moment and it records the transaction made. If a Teacher Staff’s salary is edited (for example: increased), it means this Teacher’s salary base is increased and it has nothing to do with the Finances that has been made. |
5.10. Course

5.10.1. Add a course: add-course
Add a new course to the list of course
Format: add course n/NAME a/AMOUNT [t/TAG]…
Example: add course n/Cozmo Programming a/2000 t/Fun t/Robot
5.10.2. Remove a course: delete-course
Remove a course from the list of courses
Format: delete-course ID
Example:
-
delete-course 16100
|
Be reminded that when you delete a course, the course will be deleted from every student and teacher as well. |
5.10.3. Edit information about a course: edit-course
Edits an existing course in the course list
Format: edit-course ID [n/NAME] [a/AMOUNT] [t/TAG]…
Example:
-
edit-course 1 n/Java 101 a/1000 t/intermediate
5.10.4. Locating items by name: find-course
Finds course whose names contain any of the given keywords.
Format: find-course KEYWORD [MORE_KEYWORDS]…
Examples:
-
find-course Cozmo
ReturnscozmoandCozmo Programming -
find-course Java Python C
Returns any course having namesJava,Python, orC
5.10.5. List all courses: list-course
Shows a list of all courses
Format: list-course
5.10.6. Edit information about a course: edit-course
Edits an existing course in the course list
Format: edit-course ID [n/NAME] [a/AMOUNT] [t/TAG]…
Example:
-
edit-course 16100 n/Java Programming a/2000
5.11. Finance
5.11.1. Add a finance: add-finance
Add a new finance to the list of finance
To summarise, all three types requires ft/FINANCETYPE and d/DATE to be specified.
Type 1 additionally requires n/FINANCE-NAME a/AMOUNT
Type 2 additionally requires cid/COURSEID sid/STUDENTID
Type 3 additionally requires cid/COURSEID tid/TEACHERID
|
For Type 1 miscellaneous transactions, you can specify the amount as negative(with a "-" in front) or positive(without a "-" in front) For example, a/100 or a/-100 For Type 2 student paying for a course, the amount will be positive automatically, as it is an earning For Type 3 teacher being paid for teaching a course, the amount will be negative automatically, as it is an expense To make Payment for a teacher, it is important to check the salary value of the teacher. This value is set to 0 by default when adding a new staff (teacher) if the user does not specify salary. A result of payment with amount 0 will be added if the salary of the teacher is 0. The positive and negative amount is important (for miscellaneous type) as it is used under "earnings" and "expenses" commands. |
5.11.2. Remove a finance: delete-finance
Remove a finance from the list of finances
Format: delete-finance ID
Example:
-
delete-finance 16100
5.11.3. Edit a finance
Edits an existing finance in the finance list
Format: edit-finance ID [n/NAME] [d/DATE] [a/AMOUNT] [t/TAG]…
Example:
-
edit-finance 16100 n/Buying new tables d/2020-04-13 a/3000
5.11.4. Locating items by name: find-finance
Finds finance whose names contain any of the given keywords.
Format: find-finance KEYWORD [MORE_KEYWORDS]…
Examples:
-
find-finance Payment
ReturnspaymentandReceived Payment -
find-finance Course Student Teacher
Returns any finance having namesCourse,Student, orTeacher
5.11.5. List all finances: list-finance
Shows a list of all finances
Format: list-finance
5.11.6. Get total earnings: earnings
Shows all the earnings (finances with positive amount) as a number.
Format: earnings
5.11.7. Get total expenses: expenses
Shows all the expenses (finances with positive amount) as a number.
Format: expenses
5.12. Assignment
5.12.1. Add an assignment: add-assignment
Add a new assignment to the list of all assignments
Format: n/NAME dl/DEADLINE [t/TAG]…
Example:
* add-assignment n/Adversarial Search Assignment 2 dl/2020-12-30 t/AI t/Difficult
|
|
5.12.2. Delete an assignment: delete-assignment
Format: delete-assignment ID
Example:
-
delete-assignment 16100
|
Be reminded that when you delete an assignment, the assignment will be deleted from every course as well. |
5.12.3. Edit an assignment: edit-assignment
Format: edit-assignment ID [n/NAME] dl/DEADLINE t/TAGS]
Example:
-
edit-assignment 16100 n/Edit Python Assignment 1
5.12.4. Locating items by name: find-assignment
Finds assignments whose names contain any of the given keywords.
Format: find-assignment KEYWORD [MORE_KEYWORDS]…
Examples:
-
find-assignment java
ReturnsjavaandJava Assignment
5.13. Upcoming Features
5.13.1. Add registration [coming in v2.0]
Add a register command by including role (i.e. privilege system).
Format: register id/USERNAME pw/PASSWORD n/FULL_NAME r/ROLE_ID
Examples:
-
register id/azhikai pw/1122qq n/Ang Zhi Kai r/999
5.13.2. Creating user role [coming in v2.0]
Creates a user role. User assigned with higher ranking role can execute more commands.
Format: create-role r/RANK n/ROLE_NAME
Examples:
-
create-role r/999 n/Owner -
create-role r/2 n/Supervisor -
create-role r/1 n/Employee
5.13.3. Editing user role [coming in v2.0]
Edits an existing user role.
Format: edit-role r/RANK [nr/NEW_RANK] [n/ROLE_NAME]
Examples:
-
edit-role r/999 n/Administrator -
edit-role r/2 nr/3 n/Manager
5.13.4. Deleting user role [coming in v2.0]
Deletes an existing user role.
Format: delete-role r/RANK
Examples:
-
delete-role r/999
6. Frequently Asked Questions (FAQ)
Q: How do I transfer my data to another Computer?
A: Install the application in the other computer and overwrite the empty data file it creates with the file that
contains the data of your previous CodeCampX folder.
Q: Where do I find the latest release of the application?
A: You can find all releases here.
7. Command Summary
| Section | Command | Format | Example |
|---|---|---|---|
Help |
Help |
|
|
Undo/Redo |
Undo an undoable command |
|
|
Redo a redoable command |
|
|
|
Select item |
Select a Student |
|
|
Select a Staff |
|
|
|
Select a Course |
|
|
|
Select Assignment belonging to the Course of a Student: |
|
|
|
Select Assignment belonging to the Student of a Course: |
|
|
|
Switch tab |
Switch to Summary Tab |
|
|
Switch to Student Tab |
|
|
|
Switch to Staff Tab |
|
|
|
Switch to Course Tab |
|
|
|
Switch to Finance Tab |
|
|
|
Switch to Assignment Tab |
|
|
|
Assigning to Course |
Assign Student to a Course |
|
|
Assign Teacher to a Course |
|
|
|
Assign Assignment to a Course |
|
|
|
Unassign Student from a Course |
|
|
|
Unassign Teacher from a Course |
|
|
|
Unassign Assignment from a Course |
|
|
|
Done/Undone Commands |
Mark an Assignment as Done |
|
|
Mark an Assignment as Undone |
|
|
|
Student Commands |
Add Student |
|
|
Delete Student |
|
|
|
Find Student |
|
|
|
List Student |
|
|
|
Edit Student |
|
|
|
Staff Commands |
Add Staff |
|
|
Delete Staff |
|
|
|
Find Staff |
|
|
|
List Staff |
|
|
|
Edit Staff |
|
|
|
Course Commands |
Add Course |
|
|
Delete Course |
|
|
|
Find Course |
|
|
|
List Course |
|
|
|
Edit Course |
|
|
|
Finance Commands |
Add Finance Type 1 (ft/m) |
|
|
Add Finance Type 2 (ft/cs) |
|
|
|
Add Finance Type 3 (ft/ct) |
|
|
|
Delete Finance |
|
|
|
Find Finance |
|
|
|
List Finance |
|
|
|
Calculate Earnings |
|
|
|
Calculate Expenses |
|
|